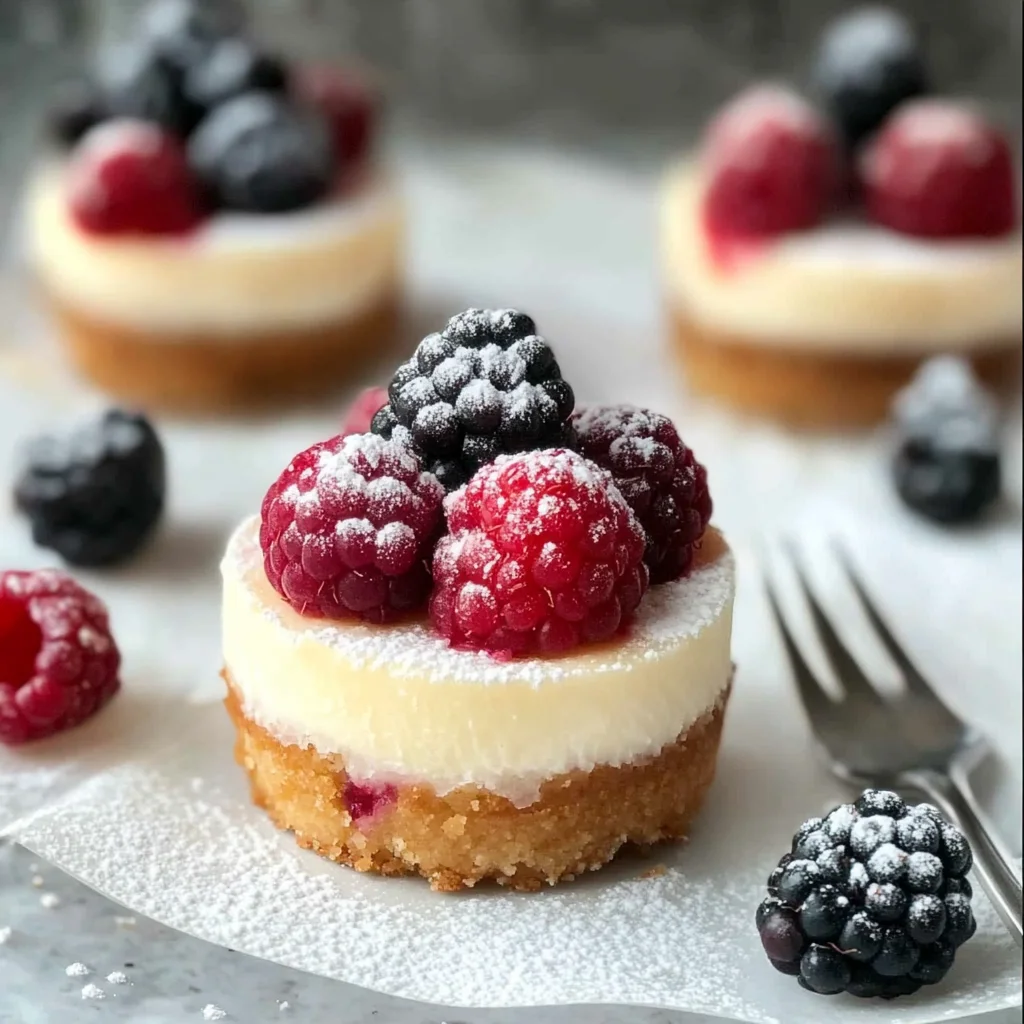
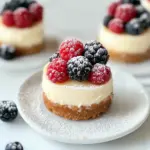
Gluten-Free Mini Cheesecakes
These Gluten-Free Mini Cheesecakes are the perfect treat for any occasion, whether it’s a gathering with friends or a family celebration. They’re easy to prepare and packed with creamy flavor. The small size makes them ideal for portion control, while the gluten-free nature ensures everyone can enjoy this delightful dessert without worry.
Why You’ll Love This Recipe
- Fuss-Free Preparation: This recipe requires minimal effort, making it a great choice for bakers of all skill levels.
- Perfect for Any Occasion: Whether it’s a party, potluck, or simply a sweet treat at home, these mini cheesecakes are versatile enough to fit any event.
- Rich and Creamy Flavor: With cream cheese as the star ingredient, every bite is filled with deliciousness that will satisfy your sweet cravings.
- Customizable Toppings: Enjoy them as-is or dress them up with berries and powdered sugar for an extra touch of elegance.
- Make Ahead Option: These cheesecakes chill well, making them an ideal make-ahead dessert that saves time on busy occasions.
Tools and Preparation
Before diving into baking these delicious mini cheesecakes, gather your essential tools. Having everything ready will streamline your cooking process.
Essential Tools and Equipment
- Muffin pan
- Muffin liners
- Mixing bowls
- Electric hand mixer or stand mixer
- Measuring cups and spoons
- Spatula
Importance of Each Tool
- Muffin pan: This is crucial for shaping your cheesecakes into perfect mini portions.
- Electric hand mixer: Ensures that your cream cheese mixture becomes light and fluffy without lumps.
- Spatula: Helps in scraping down the sides of the bowl to ensure all ingredients are well incorporated.
Ingredients
These fuss-free gluten-free mini cheesecakes are perfect for parties or potlucks and couldn’t be any easier to make!
For the Crust
- 1 1/4 cups blanched almond flour
- 1/4 cup granulated sugar
- pinch of salt
- 1 tablespoon lemon zest
- 3 tablespoons unsalted butter (melted and cooled slightly)
For the Filling
- 2 8-ounce packages cream cheese
- 1/2 cup granulated sugar
- 1 teaspoon vanilla extract
- pinch of salt
- 2 large eggs (room temperature)
Optional Toppings
- berries
- powdered sugar
How to Make Gluten-Free Mini Cheesecakes
Step 1: Preheat the Oven
Preheat the oven to 350 degrees F. Line a muffin pan with 12 muffin liners.
Step 2: Prepare the Crust
In a medium mixing bowl:
1. Stir together all dry ingredients including almond flour, granulated sugar, salt, and lemon zest.
2. Add the melted butter and mix until thoroughly combined.
Step 3: Fill the Muffin Liners
- Divide the crust mixture evenly among the muffin liners (about 18 grams or 3 1/2 teaspoons per liner).
- Lightly press down using the bottom of a shot glass.
Step 4: Bake the Crust
Bake for about 10 minutes or until very lightly browned. Remove from oven and let cool for at least 10 minutes while preparing the filling.
Step 5: Make the Filling
Using an electric hand mixer:
1. Beat together cream cheese and sugar at medium speed until light and creamy.
2. Add vanilla extract and pinch of salt; mix until combined.
3. Beat in eggs one at a time on low speed just until well incorporated—avoid over mixing!
Step 6: Bake Cheesecakes
- Fill each liner about 2/3 full with cheesecake batter.
- Bake for an additional 10 minutes or until centers do not jiggle when tapped.
- Open the oven door wide (at least 1 foot) to cool cheesecakes to room temperature—this takes about 1 1/2 hours.
Step 7: Chill Before Serving
For easiest removal, take out paper liners now; they can also be removed after chilling but may stick more. Chill in refrigerator for at least 2 hours before serving. Decorate with berries and dust lightly with powdered sugar if desired. Enjoy within four days!
How to Serve Gluten-Free Mini Cheesecakes
These delightful mini cheesecakes can be served in various ways that enhance their flavor and presentation. You can customize them to suit different occasions, making them ideal for every gathering.
Fresh Fruit Topping
- Berries – Top your mini cheesecakes with fresh strawberries, blueberries, or raspberries for a burst of flavor and a pop of color.
- Sliced Bananas – Add slices of ripe bananas for a creamy contrast and natural sweetness.
Whipped Cream
- Classic Whipped Cream – A dollop of freshly whipped cream adds a light and airy texture that complements the richness of the cheesecake.
- Flavored Whipped Cream – For an extra twist, mix in vanilla extract or lemon zest into your whipped cream before topping.
Chocolate Drizzle
- Dark Chocolate Sauce – Drizzle melted dark chocolate over your mini cheesecakes for a decadent touch.
- Caramel Sauce – A light drizzle of caramel sauce brings a sweet and buttery flavor that pairs wonderfully with cream cheese.
Nuts and Seeds
- Chopped Nuts – Sprinkle crushed almonds or walnuts on top for added crunch and nuttiness.
- Toasted Coconut – Add toasted coconut flakes for a tropical flair and added texture.
How to Perfect Gluten-Free Mini Cheesecakes
Achieving the perfect gluten-free mini cheesecakes requires attention to detail. Here are some key tips to ensure success.
- Use room temperature ingredients – Allowing cream cheese and eggs to reach room temperature ensures they blend smoothly, creating a creamy filling without lumps.
- Don’t overmix – Mix just until combined. Overmixing can incorporate too much air, leading to cracks during baking.
- Check doneness carefully – The centers should not jiggle when tapped. This will ensure that they are set properly without being overcooked.
- Cool gradually – Letting the cheesecakes cool slowly in the oven helps prevent cracks from sudden temperature changes.
- Chill adequately – Refrigerate the cheesecakes for at least 2 hours before serving. This allows them to firm up and enhances their flavors.
Best Side Dishes for Gluten-Free Mini Cheesecakes
Pairing side dishes with your gluten-free mini cheesecakes can elevate your dessert experience. Here are some great options to consider:
- Fruit Salad – A refreshing mix of seasonal fruits complements the richness of cheesecake beautifully.
- Cheese Platter – Serve an assortment of cheeses to balance sweetness with savory flavors.
- Coffee or Tea – A warm cup of coffee or tea provides a comforting beverage pairing that enhances dessert enjoyment.
- Cookies – Gluten-free cookies like almond or coconut macaroons add variety and texture alongside your mini cheesecakes.
- Ice Cream – A scoop of dairy-free ice cream offers a cool contrast to the warmth of freshly baked mini cheesecakes.
- Granola – Serve with crunchy gluten-free granola on the side for an added crunch factor, perfect for those who enjoy textures in their desserts.
Common Mistakes to Avoid
Making gluten-free mini cheesecakes can be simple, but there are a few common mistakes you should avoid for the best results.
- Not measuring ingredients accurately – Precision is key in baking. Use a kitchen scale or measuring cups to ensure accuracy and consistency.
- Overmixing the batter – Overmixing can lead to dense cheesecakes. Mix just until the ingredients are combined for a light and airy texture.
- Skipping the cooling period – Allowing the cheesecakes to cool gradually prevents cracks. Don’t rush this step; it’s crucial for texture.
- Not chilling before serving – Chilling enhances flavor and texture. Be patient and let them chill for at least two hours for the best experience.
- Using old or expired ingredients – Fresh ingredients yield better taste. Check expiration dates on cream cheese and eggs before starting your recipe.

Storage & Reheating Instructions
Refrigerator Storage
- Store in an airtight container to maintain freshness.
- They can last up to 4 days in the refrigerator.
Freezing Gluten-Free Mini Cheesecakes
- Wrap individual mini cheesecakes tightly in plastic wrap.
- Place them in a freezer-safe container; they can be frozen for up to 2 months.
Reheating Gluten-Free Mini Cheesecakes
- Oven – Preheat the oven to 300°F (150°C) and heat for about 10-15 minutes until warmed through.
- Microwave – Heat on low power in short intervals (15-20 seconds) until warm, but avoid overheating.
- Stovetop – For a quick reheat, place mini cheesecakes in a pan over low heat, covering with a lid for a few minutes.
Frequently Asked Questions
Here are some common questions about gluten-free mini cheesecakes that might help you along your baking journey.
What makes these Gluten-Free Mini Cheesecakes gluten-free?
The use of blanched almond flour as the crust ensures that these mini cheesecakes are free from gluten-containing grains.
Can I customize my Gluten-Free Mini Cheesecakes?
Absolutely! You can add different flavors like lemon or chocolate, or top with various fruits to make them your own.
How do I prevent cracks in my mini cheesecakes?
Cooling them gradually in the oven and not overmixing will help prevent cracks on top of your mini cheesecakes.
How long do Gluten-Free Mini Cheesecakes last?
When stored properly, these mini cheesecakes can last up to 4 days in the refrigerator or up to 2 months if frozen.
Can I use dairy-free alternatives?
Yes! You can substitute cream cheese with dairy-free cream cheese options available at many grocery stores.
Final Thoughts
These gluten-free mini cheesecakes are not only delightful but also incredibly versatile. You can customize them with various toppings and flavors, making them perfect for any occasion. Don’t hesitate to try this easy recipe and impress your friends and family!
Gluten-Free Mini Cheesecakes
Indulge in the creamy delight of Gluten-Free Mini Cheesecakes, a perfect treat for any occasion. These bite-sized desserts are easy to make and suitable for gatherings, from casual get-togethers to special celebrations. Made with blanched almond flour for a gluten-free crust and rich cream cheese filling, they provide a satisfying experience without the worry of gluten. Customize them with fresh berries or a dusting of powdered sugar for a touch of elegance. Plus, with the ability to make them ahead of time, you’ll save precious minutes on busy days while still impressing your guests.
- Prep Time: 20 minutes
- Cook Time: 20 minutes
- Total Time: 40 minutes
- Yield: Makes about 12 mini cheesecakes 1x
- Category: Dessert
- Method: Baking
- Cuisine: American
Ingredients
- 1 1/4 cups blanched almond flour
- 1/4 cup granulated sugar
- pinch of salt
- 1 tablespoon lemon zest
- 3 tablespoons unsalted butter (melted and cooled slightly)
- 2 8-ounce packages cream cheese
- 1/2 cup granulated sugar
- 1 teaspoon vanilla extract
- pinch of salt
- 2 large eggs (room temperature)
- berries (for topping)
- powdered sugar (for topping)
Instructions
- Preheat oven to 350°F (175°C). Line a muffin pan with muffin liners.
- In a bowl, combine almond flour, sugar, salt, and lemon zest. Add melted butter and mix until combined.
- Divide the crust mixture among liners and press down gently.
- Bake crusts for about 10 minutes until lightly browned; let cool.
- Beat cream cheese and sugar until creamy, then add vanilla and salt. Mix in eggs one at a time.
- Fill each liner with cheesecake batter until about 2/3 full and bake for another 10 minutes.
- Allow cheesecakes to cool gradually in the oven for about 1.5 hours before chilling in the refrigerator for at least 2 hours.
Nutrition
- Serving Size: 1 serving
- Calories: 145
- Sugar: 9g
- Sodium: 98mg
- Fat: 10g
- Saturated Fat: 5g
- Unsaturated Fat: 4g
- Trans Fat: 0g
- Carbohydrates: 12g
- Fiber: 1g
- Protein: 3g
- Cholesterol: 55mg