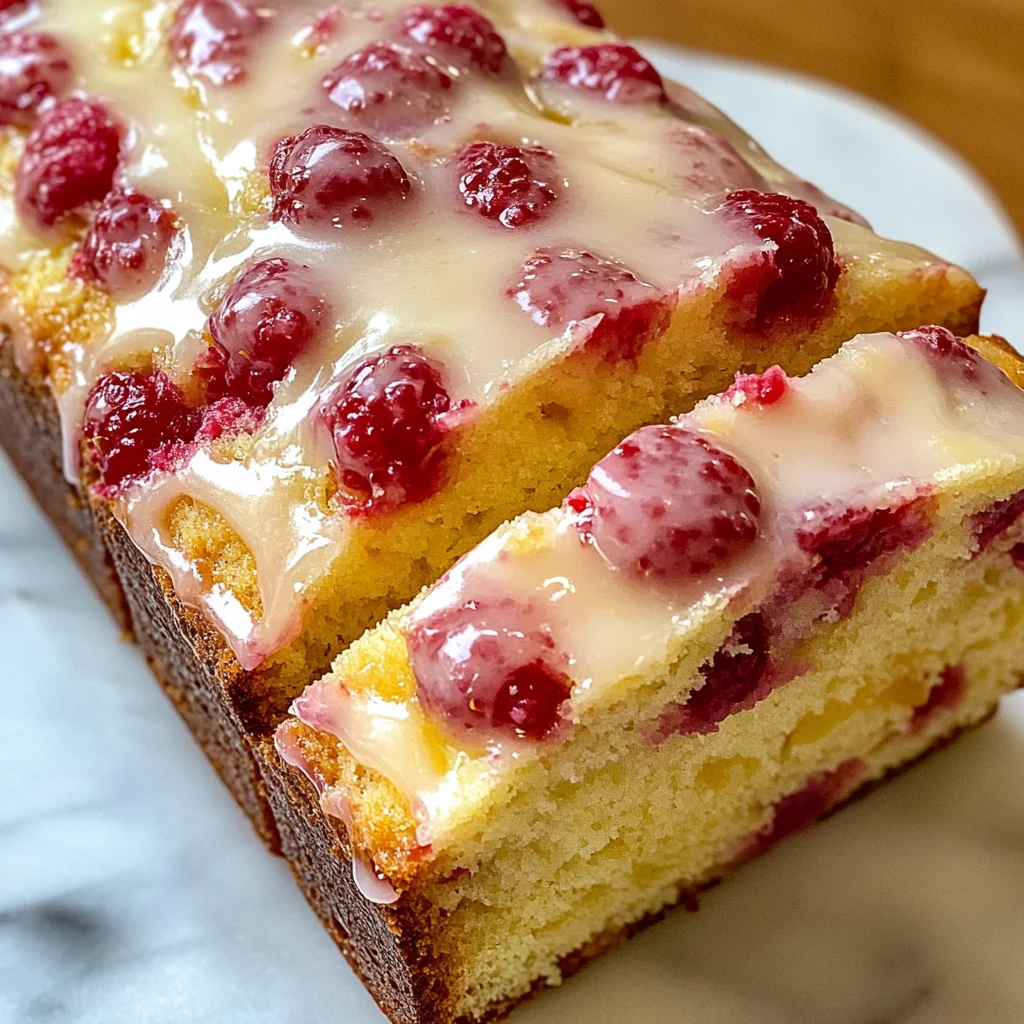
Gluten-Free Raspberry Lemon Loaf
Light, lemony, and bursting with raspberries, this Gluten-Free Raspberry Lemon Loaf is a delightful treat for any occasion. Whether you’re looking for a sweet breakfast, a tasty brunch item, or a snack to enjoy throughout the day, this loaf is perfect. Its incredible moistness and fluffy texture will surprise everyone with its gluten-free nature. Topped with a sweet and tangy lemon glaze, it elevates the flavors to next-level deliciousness!
Why You’ll Love This Recipe
- Easy to Make: This recipe is simple and requires minimal effort, making it perfect for bakers of all skill levels.
- Bursting with Flavor: The combination of fresh raspberries and zesty lemon creates a refreshing taste that’s hard to resist.
- Versatile Serving Options: Enjoy it for breakfast, as an afternoon snack, or even as a dessert after dinner.
- Gluten-Free Goodness: No one will believe it’s gluten-free! It’s soft and fluffy without compromising on flavor.
- Dairy-Free Option Available: Substitute with dairy-free alternatives easily to suit your dietary needs.
Tools and Preparation
Before you begin baking your Gluten-Free Raspberry Lemon Loaf, gather the essential tools needed for this recipe. Having everything ready will streamline your cooking process.
Essential Tools and Equipment
- Loaf pan
- Mixing bowls
- Whisk
- Spatula
- Measuring cups and spoons
Importance of Each Tool
- Loaf pan: Provides the perfect shape for your bread, ensuring even baking.
- Mixing bowls: Essential for combining ingredients efficiently while preventing spills.
- Whisk: Helps achieve a smooth batter by thoroughly mixing wet ingredients.
- Spatula: Great for folding in delicate ingredients like raspberries without breaking them apart.

Ingredients
To make this delightful loaf, you’ll need the following:
For the Loaf
- 2 cups gluten-free all purpose flour with xanthan gum
- 1 tablespoon gluten free baking powder
- 1/2 teaspoon salt
- 3/4 cup granulated sugar
- 8 tablespoon butter or dairy-free alternative, melted and slightly cooled
- 1/2 cup plain Greek yogurt or dairy-free Greek yogurt
- 3 large eggs, room temperature
- 1 tablespoon fresh lemon juice
- 2 packed teaspoons freshly grated lemon zest
- 1 teaspoon vanilla extract
- 1 teaspoon lemon extract
- 1 1/2 cup fresh raspberries
For the Lemon Glaze
- 1 tablespoon lemon juice
- 1 tablespoon granulated sugar
- 2 tablespoons lemon juice
- 1 cup confectioners (aka powdered) sugar
How to Make Gluten-Free Raspberry Lemon Loaf
Step 1: Prepare the Dry Ingredients
In a large bowl, whisk together:
1. Gluten-free flour,
2. Baking powder,
3. Salt.
Set aside.
Step 2: Mix Wet Ingredients
In another bowl:
1. Beat together 3 large eggs lightly.
2. Add in:
– Granulated sugar
– Melted butter
– Greek yogurt
– Fresh lemon juice
– Lemon zest
– Vanilla extract
– Lemon extract.
3. Mix until well combined and smooth.
Step 3: Combine Mixtures
Add the dry ingredients into the wet mixture:
1. Mix until thoroughly combined with no lumps remaining (about 1 minute).
Step 4: Fold in Raspberries
Gently fold in:
– The fresh raspberries using a spatula or spoon until evenly distributed. Avoid mixing too hard to keep raspberries intact.
Step 5: Rest the Batter
Cover the bowl with plastic wrap:
1. Let batter rest at room temperature for 20 minutes (no longer than 30).
Step 6: Preheat Oven & Prepare Pan
While the batter rests:
1. Preheat oven to 375°F (190°C).
2. Line a 10-inch loaf pan with parchment paper or grease and flour it.
Step 7: Fill & Bake
After resting:
1. Spoon the batter into the loaf pan and spread evenly.
2. Top with extra raspberries if desired.
3. Bake uncovered for 40-45 minutes until golden; then cover loosely with foil and bake an additional 10-15 minutes until a toothpick inserted comes out clean (total baking time about 55-60 minutes).
Step 8: Make Lemon Simple Syrup
Right before removing bread from oven:
1. Mix together:
– Lemon juice
– Sugar.
Stir until well combined.
Step 9: Brush with Syrup & Cool
After removing from oven:
1. Carefully brush the top of the loaf generously with lemon syrup.
2. Let cool in pan for at least 30 minutes before gently removing from pan.
3. Continue cooling on a wire rack.
Step 10: Prepare Lemon Glaze
Once cooled:
1. Whisk together:
– Confectioners sugar
– Remaining lemon juice until smooth.
2. Drizzle over cooled bread before slicing.
Step 11: Storing Instructions
Store any leftover bread at room temperature wrapped in wax paper and foil for up to four days or freeze it for up to three months.
Enjoy your deliciously tangy Gluten-Free Raspberry Lemon Loaf!
How to Serve Gluten-Free Raspberry Lemon Loaf
Serving your Gluten-Free Raspberry Lemon Loaf can elevate the experience and make it more enjoyable. This lovely loaf can be paired with various accompaniments that enhance its bright flavors. Here are some delightful serving suggestions.
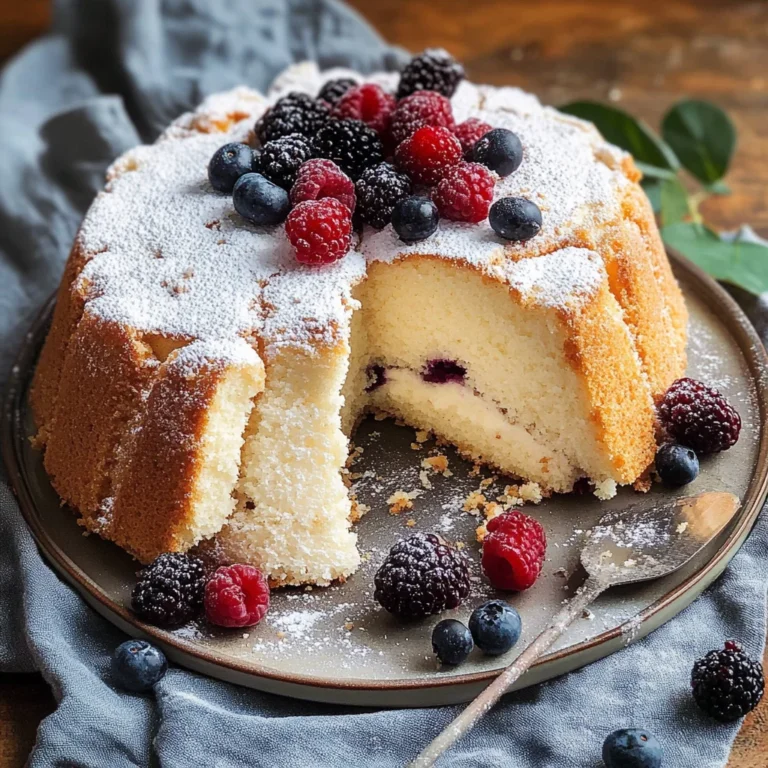
With Fresh Berries
- Serve slices topped with a medley of fresh berries like strawberries, blueberries, or blackberries for an extra fruity kick.
With Whipped Cream
- Add a dollop of whipped cream on the side or on top of each slice for a creamy contrast that complements the lemony sweetness.
As French Toast
- Transform leftovers into French toast by soaking slices in an egg mixture and pan-frying them until golden brown. Top with maple syrup for a delicious breakfast twist.
With Tea or Coffee
- Pair slices with your favorite tea or coffee. The citrus notes of lemon and tartness of raspberries go wonderfully with both beverages.
With Lemon Curd
- Spread a layer of lemon curd on each slice for an added tangy flavor that enhances the overall taste experience.
How to Perfect Gluten-Free Raspberry Lemon Loaf
Perfecting your Gluten-Free Raspberry Lemon Loaf is all about attention to detail. Here are some tips to ensure your loaf turns out beautifully every time.
-
Use Room Temperature Ingredients: Ensure eggs and yogurt are at room temperature for better mixing and a fluffier texture.
-
Gently Fold in Raspberries: Avoid using a mixer when adding raspberries; gently fold them in by hand to keep them intact and prevent mushiness.
-
Measure Flour Accurately: Use a kitchen scale or spoon and level method to measure flour correctly. This prevents dense loaves caused by too much flour.
-
Allow Batter to Rest: Letting the batter rest for 20 minutes allows the gluten-free flour to hydrate fully, resulting in a moister loaf.
-
Check for Doneness Early: Start checking your loaf 5 minutes before the suggested baking time. Ovens can vary, so it’s best not to overbake.
Best Side Dishes for Gluten-Free Raspberry Lemon Loaf
Pairing side dishes with your Gluten-Free Raspberry Lemon Loaf can create a delightful meal or snack experience. Consider these options that complement its flavors well.
-
Greek Yogurt Parfait: Layer Greek yogurt with fresh fruits and granola for a nutritious and satisfying side dish.
-
Fruit Salad: A simple fruit salad made with seasonal fruits adds freshness and balances the sweetness of the loaf.
-
Chia Seed Pudding: Prepare chia seed pudding with almond milk and top it with berries for a healthy and filling accompaniment.
-
Nut Butter Spread: Serve with almond or cashew butter spread on warm slices for an extra protein boost and rich flavor.
-
Green Smoothie: A refreshing green smoothie made with spinach, banana, and coconut water pairs well as a light beverage option.
-
Savory Cheese Platter: Offer slices of mild cheese alongside crackers for a sweet-and-savory combination that guests will love.
Common Mistakes to Avoid
Making the perfect Gluten-Free Raspberry Lemon Loaf can sometimes be tricky. Here are some common mistakes you should avoid to ensure yours turns out delicious.
- Overmixing the Batter: Mixing too much can make your loaf dense. Mix just until combined for a light, fluffy texture.
- Not Measuring Ingredients Accurately: Using incorrect measurements can lead to poor results. Always use a kitchen scale or proper measuring cups for accuracy.
- Skipping the Resting Time: Allowing the batter to rest is crucial for proper texture. Don’t skip this step; it helps with moisture and rise.
- Using Cold Ingredients: Cold eggs or yogurt can affect how well your loaf rises. Make sure all ingredients are at room temperature before mixing.
- Neglecting to Check Oven Temperature: An inaccurate oven can ruin your baking. Use an oven thermometer to confirm that your oven is properly calibrated.
Storage & Reheating Instructions
Refrigerator Storage
- Store in an airtight container for up to 4 days.
- Keep it wrapped in wax paper and foil for best freshness.
Freezing Gluten-Free Raspberry Lemon Loaf
- Wrap the cooled loaf tightly in plastic wrap, then in aluminum foil.
- It can be frozen for up to 3 months.
Reheating Gluten-Free Raspberry Lemon Loaf
- Oven: Preheat to 350°F and warm the loaf for about 10-15 minutes.
- Microwave: Heat individual slices for about 15-20 seconds, but be careful not to dry them out.
- Stovetop: Use a non-stick pan over low heat, covering it with a lid to keep moisture in, warming each slice for a few minutes.
Frequently Asked Questions
Here are some frequently asked questions regarding the Gluten-Free Raspberry Lemon Loaf.
Can I use frozen raspberries instead of fresh?
Yes, you can use frozen raspberries! Just make sure they are thawed and drained before adding them to the batter.
What is the best way to customize my Gluten-Free Raspberry Lemon Loaf?
You can add nuts, like almonds or walnuts, or substitute lemon zest with orange zest for a different flavor twist.
How do I know when my loaf is done baking?
The loaf is done when it’s golden brown on top and a toothpick inserted in the center comes out clean.
Can I make this recipe dairy-free?
Absolutely! Simply use a dairy-free butter alternative and dairy-free Greek yogurt for a deliciously dairy-free option.
Final Thoughts
This Gluten-Free Raspberry Lemon Loaf is not only delightful but also versatile enough for breakfast, dessert, or as a snack. Its vibrant flavors and moist texture will impress everyone who tries it. Feel free to customize with your favorite add-ins or glazes!
Gluten-Free Raspberry Lemon Loaf

Indulge in the delightful flavors of this Gluten-Free Raspberry Lemon Loaf, a perfect blend of moistness and zest that’s sure to brighten your day. Each slice is packed with fresh raspberries and lively lemon notes, making it an ideal choice for breakfast, brunch, or a sweet afternoon snack. Topped with a tangy lemon glaze, this loaf is not only gluten-free but also surprisingly light and fluffy. Whether enjoyed on its own or paired with fresh berries and a dollop of whipped cream, this treat will impress friends and family alike. Easy to make and absolutely delicious, it’s time to bring this fruity delight into your kitchen!
- Prep Time: 20 minutes
- Cook Time: 55 minutes
- Total Time: 1 hour 15 minutes
- Yield: Approximately 10 servings 1x
- Category: Dessert
- Method: Baking
- Cuisine: American
Ingredients
- 2 cups gluten-free all-purpose flour
- 1 tablespoon gluten-free baking powder
- 1/2 teaspoon salt
- 3/4 cup granulated sugar
- 8 tablespoons butter or dairy-free alternative, melted and slightly cooled
- 1/2 cup plain Greek yogurt or dairy-free Greek yogurt
- 3 large eggs, room temperature
- 1 tablespoon fresh lemon juice
- 2 packed teaspoons freshly grated lemon zest
- 1 teaspoon vanilla extract
- 1 teaspoon lemon extract
- 1 1/2 cup fresh raspberries
- 1 tablespoon lemon juice (for glaze)
- 1 tablespoon granulated sugar (for glaze)
- 2 tablespoons lemon juice (for glaze)
- 1 cup confectioners (aka powdered) sugar (for glaze)
Instructions
- In a large bowl, whisk together gluten-free flour, baking powder, and salt. Set aside.
- In another bowl, beat three large eggs lightly. Add in granulated sugar, melted butter, Greek yogurt, fresh lemon juice, lemon zest, vanilla extract, and lemon extract. Mix until well combined and smooth.
- Add the dry ingredients into the wet mixture. Mix until thoroughly combined with no lumps remaining (about 1 minute).
- Gently fold in the fresh raspberries using a spatula or spoon until evenly distributed.
- Cover the bowl with plastic wrap and let batter rest at room temperature for 20 minutes.
- Preheat oven to 375°F (190°C). Line a 10-inch loaf pan with parchment paper or grease and flour it.
- Spoon the batter into the loaf pan and spread evenly. Top with extra raspberries if desired. Bake uncovered for 40-45 minutes until golden; then cover loosely with foil and bake an additional 10-15 minutes until a toothpick inserted comes out clean.
- Mix together lemon juice and sugar for the syrup. Stir until well combined.
- Brush the top of the loaf generously with lemon syrup after removing from oven. Let cool in pan for at least 30 minutes before gently removing from pan. Continue cooling on a wire rack.
- Whisk together confectioners sugar and remaining lemon juice until smooth. Drizzle over cooled bread before slicing.
Nutrition
- Serving Size: 1 slice (60g)
- Calories: 185
- Sugar: 12g
- Sodium: 150mg
- Fat: 7g
- Saturated Fat: 4g
- Unsaturated Fat: 2g
- Trans Fat: 0g
- Carbohydrates: 29g
- Fiber: 1g
- Protein: 3g
- Cholesterol: 60mg